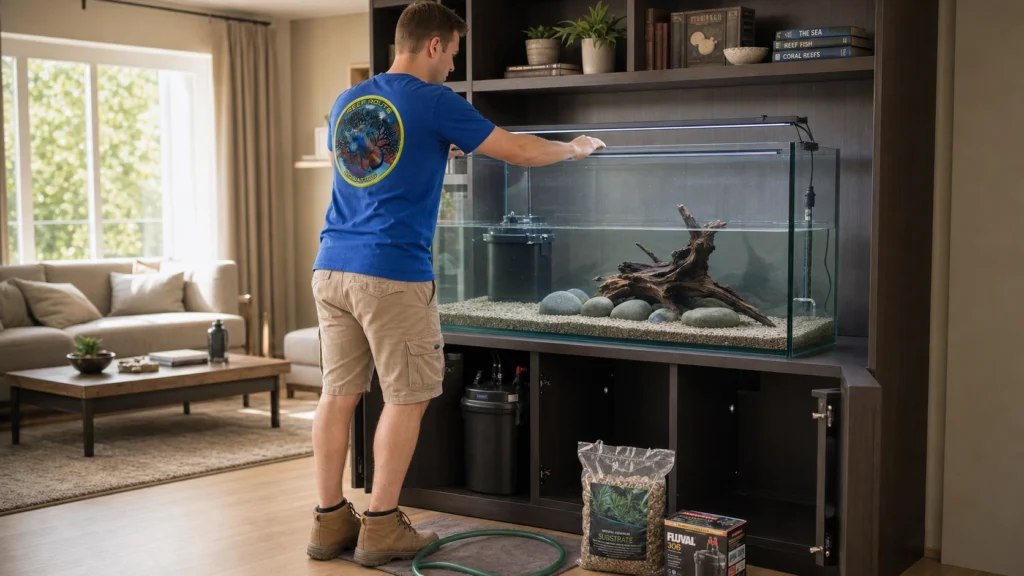
An aquarium setup covers everything that happens before a single fish goes in the water: picking the right tank and location, assembling the stand, adding substrate and hardscape, installing the filter, heater, and lighting, then running the tank through its nitrogen cycle. Get this stage right and the tank practically runs itself for years. Get it wrong, and you’re troubleshooting cloudy water, algae, or dead fish before the first month is over.
Whether you’re setting up a 20-gallon starter tank on a Smyrna kitchen counter or planning a larger display for a Murfreesboro living room, the setup phase is where most beginner mistakes actually happen — and almost all of them are avoidable with the right sequence and a little patience. Here’s exactly what you need, the order to do it in, what it costs, and when it’s worth handing off to a professional.
An aquarium looks like a simple glass box, but it’s a closed biological system from the moment you add water. Fish waste, uneaten food, and decaying plant matter constantly produce ammonia, and that ammonia has nowhere to go until a colony of beneficial bacteria is established to break it down (PetMD).
Skip or rush that step and you get what’s commonly called new tank syndrome — a toxic ammonia and nitrite spike that’s the single biggest cause of fish deaths in the first month of ownership. A proper setup sequence builds in the time and conditions that colony needs before any livestock is at risk:
Tank size sets the margin for error. A 20–40 gallon tank dilutes waste and temperature swings far better than a 5–10 gallon tank, which is why most experienced keepers steer beginners toward a larger first tank rather than a smaller one (Fishkeeping World).
Location and structural support come first. Water weighs about 8.3 lbs per gallon, so a filled 40-gallon tank with substrate and stand can weigh 400+ lbs — the surface underneath needs to be flat, level, and rated for that load before anything else is decided (Aquarium Co-Op).
Equipment sizing prevents downstream problems. An undersized filter or heater is one of the most common setup mistakes and it shows up weeks later as poor water quality or unstable temperature, not immediately.
Every credible setup guide converges on roughly the same core list (Aquarium Co-Op; Aquariadise):
Tank and stand — sized correctly for the space and rated to hold the filled weight
Filter — rated for at least 2–3x your tank volume in turnover per hour
Heater — roughly 5 watts per gallon for tropical species, with a separate thermometer to verify it
Lighting — LED fixtures are now the standard for both fish-only and planted setups
Substrate — gravel (1–2 lbs per gallon) or sand (1 lb per gallon)
Water conditioner/dechlorinator — removes chlorine and chloramine from tap water before it ever touches livestock
Liquid test kit — for ammonia, nitrite, nitrate, and pH; strips are not accurate enough for cycling
Hardscape and decor — driftwood, rock, and hiding spots for stress reduction
Gravel vacuum/siphon, fish net, and a dedicated bucket — reserved only for aquarium use, never for cleaning anything else
Almost every reputable setup guide follows the same core sequence, whether it’s a 20-gallon community tank or a larger custom display (Blessings Aquarium; Aquariadise):
Choose the final location first. Set the empty tank where it will permanently live — on a level, sturdy surface away from direct sunlight, drafts, and heating/cooling vents. Moving a tank once it’s even partially filled risks cracking the glass or straining the seals.
Level the stand and place the tank. Confirm the stand is rated for the filled weight and sits perfectly level in both directions before the tank goes on top.
Rinse everything before it goes in. Rinse substrate, rock, and driftwood in plain water — never soap — until the water runs mostly clear. This single step prevents days of unnecessary cloudiness.
Add substrate and arrange hardscape. Spread substrate evenly, then place rocks and driftwood directly on the tank glass rather than on top of loose substrate so they can’t shift later. It’s far easier to arrange a dry tank than a full one.
Install the filter, heater, and thermometer — but don’t power them on yet. Position the heater near the filter outflow for even circulation, and let a fully submerged heater sit for 20–30 minutes before switching it on.
Fill slowly and dechlorinate. Pour water over a plate or bowl to avoid disturbing the substrate, then treat with a full dose of water conditioner as soon as the tank is full — this step isn’t optional even if the tap water looks clean.
Power on the equipment and run it for 24 hours. Check for leaks at the base, confirm the heater is holding a stable temperature, and verify the filter is actually moving water before moving on.
Start the nitrogen cycle — and don’t add fish yet. This is the step almost every rushed setup skips, and it’s the one that determines whether the tank thrives or crashes in the first month.
The nitrogen cycle is the process of growing enough beneficial bacteria to convert toxic ammonia into nitrite, then into far less harmful nitrate. A fishless cycle — dosing pure ammonia to 2–4 ppm and waiting for both ammonia and nitrite to read zero within 24 hours — typically takes 4 to 6 weeks done the standard way (PetMD; Aquarium Co-Op).
A few things consistently separate a smooth cycle from a stalled or fish-killing one:
Never add fish to an uncycled tank. Ammonia and nitrite are both toxic, and a brand-new tank has zero capacity to process either until bacteria are established.
Bacterial supplements and seeded media can shorten the timeline meaningfully. Adding filter media, gravel, or a sponge from an already-established, disease-free tank — or using a bottled bacteria product — can bring a full cycle down to as little as one to two weeks in some cases (Fishkeeping World).
Warmer water speeds bacterial growth. Keeping the tank in the 78–82°F range during cycling helps the colony establish faster than a cooler tank.
Stock gradually once cycled. Add a small first group of hardy fish, wait a week or two while monitoring parameters, then add more — dumping in a full stocking list on day one is one of the fastest ways to crash a freshly cycled tank.
Setup cost varies enormously by tank size and water type. Industry cost breakdowns generally land in these ranges for a complete DIY setup, including tank, stand, and core equipment (The Aquarium Expert):
| Tank size | Freshwater setup | Saltwater/reef setup |
|---|---|---|
| 10–20 gallons | $150 – $400 | $500 – $800 |
| 20–40 gallons (recommended starter range) | $275 – $600 | $800 – $1,500 |
| 50–75 gallons | $400 – $1,200 | $1,200 – $2,500 |
| 100+ gallons | $1,500 – $5,000+ | $2,500 – $10,000+ |
Saltwater and reef systems cost more at every tier mainly because of protein skimmers, sumps, reef-grade lighting, and live rock or coral — expect roughly 2–4x the freshwater price for a comparable tank size. If you’d rather have the whole process professionally handled, adding a licensed installer to the job typically adds $800–$4,000 on top of equipment costs depending on tank size and complexity (designtransitionstudio.com) — which is why we quote installation as a separate line after seeing the actual space and goals. Our companion aquarium installation guide breaks that side of the cost down in more depth.
The same handful of mistakes account for most first-tank failures (Fishkeeping World; MB Store):
Starting too small. A 5–10 gallon “starter kit” tank is actually harder to keep stable than a 20–40 gallon tank — smaller water volumes swing faster on temperature and ammonia.
Skipping or rushing the nitrogen cycle. Adding fish before ammonia and nitrite both read zero is the single most common cause of early fish deaths.
Overstocking on day one. Adding a full stocking list before the bacterial colony has caught up overwhelms the filter and triggers a secondary ammonia spike.
Skipping the water conditioner. Chlorine and chloramine in tap water damage fish gill tissue and kill the beneficial bacteria you’re trying to establish — this step is never optional, even on a “just refilling” day.
Pouring water directly onto bare substrate. This clouds the water for days; pour over a plate, bowl, or your hand instead to break up the flow.
Overcleaning a young tank. Scrubbing every surface and rinsing filter media under tap water strips out the beneficial bacteria you just spent weeks growing — rinse mechanical media in old tank water only.
Ignoring the adult size of fish. Species sold as small juveniles at the store often outgrow a first tank within a year, leading to stress and stunted growth.
Plenty of hobbyists successfully set up their own freshwater community tank following the steps above. A professional setup tends to make the most sense when:
You’re installing a saltwater or reef system that needs precise plumbing, dosing, and skimmer sizing from day one — see our reef aquarium service page for what that involves.
You’re planning a large, built-in, or in-wall display that needs a structural evaluation or dedicated electrical and plumbing work — our custom aquarium design process covers this from the first consultation.
The tank is going into a commercial space like an office, restaurant, or medical facility, where downtime and appearance matter more than a DIY timeline allows — details are on our commercial aquarium service page.
You want a dedicated RODI water system set up alongside the tank rather than mixing water manually — see our RODI systems page.
You simply want the cycling done correctly and faster than a solo DIY timeline, with someone available to troubleshoot if parameters don’t behave as expected.
Either way, setup is only step one. Once a tank is cycled and stocked, it needs a consistent maintenance schedule to stay balanced — the two phases work together, not separately.
Reef Route Aquatics helps homeowners and businesses plan and execute aquarium setups throughout Middle Tennessee, including Nashville, Murfreesboro, Franklin, Brentwood, Smyrna, Mt. Juliet, Lebanon, Gallatin, Nolensville, and Spring Hill. Whether you want a hands-on consultation to get your own DIY setup started correctly or a full turnkey installation, we walk through tank size, equipment, and cycling before you spend a dollar on the wrong gear. Take a look at what our customers say about starting their tanks off right with us.
What size aquarium should a beginner start with?
Most experienced keepers recommend 20–40 gallons rather than a 5–10 gallon “starter kit.” Larger volumes dilute waste and temperature swings far better, which makes early mistakes much more forgiving (Fishkeeping World).
How long does a full aquarium setup take from empty tank to first fish?
Physical setup — stand, substrate, equipment, and filling — takes a few hours to a day. The nitrogen cycle that follows takes another 4–6 weeks in a standard fishless cycle, or as little as 1–2 weeks with seeded filter media or bacterial supplements (PetMD).
Do I really need to cycle the tank before adding fish?
Yes, without exception. Ammonia and nitrite are toxic to fish, and a brand-new tank has no bacteria in place to process either one. Adding fish before the cycle completes is the leading cause of new-tank fish deaths.
How much does a basic aquarium setup cost?
A complete 20–40 gallon freshwater setup typically runs $275–$600 in equipment; a comparable saltwater setup runs $800–$1,500 (The Aquarium Expert). Professional installation adds $800–$4,000 depending on size and complexity, quoted after a free consultation.
Should I set up my aquarium myself or hire a professional?
Freshwater community tanks are very doable as a DIY project if you follow the sequence above. Reef, saltwater, large custom builds, and commercial installations are where a professional setup pays for itself in avoided mistakes and a faster, safer cycle. Get in touch to schedule a free consultation.
Have more questions? Check our full aquarium service FAQ for pricing, service area, and policy details.
The setup phase only happens once — get the tank size, equipment, and cycle right from the start and everything after that gets easier. If you want a second opinion on your plan or a full professional setup anywhere in Middle Tennessee, schedule a free consultation with Reef Route Aquatics, or reach us directly at (615) 410-7038 or Service@reefrouteaquatics.com. See why homeowners and businesses across the region trust our team, and learn more about who we are and how we approach the hobby.
Related: Aquarium Installation Services · Aquarium Maintenance Plans · Custom Aquarium Design · Reef Aquarium Service · RODI Systems · Commercial Aquarium Service · Aquarium Service FAQ
We use cookies to personalize content, provide social media features, and analyze our traffic. We also share information about your use of our site with our analytics partners. You can change your preferences at any time. For more information, please see our Privacy Policy and Cookie Policy. Privacy Policy